Showing posts with label vegetarian. Show all posts

Wednesday, December 7, 2011

Indian Spiced Roasted Squash Soup

I don't think there is anything more comforting than a warm bowl of soup on a cold day. We have been having a freak warm streak lately, but it has finally cooled down enough to properly savor a nice warm bowl. I have been trying to find some different versions- a bit of a twist if you will- on the classic recipes. And since I am still buying squash after squash like it's going out of style, this Indian-spiced roasted squash soup recipe I saw in Cooking Light was perfect!

This is not the greatest picture- soups are so difficult to get a good shot of- but it is definitely better than this picture looks! It had just the perfect amount of spiciness, and the sweet yogurt garnish balanced that perfectly. It is definitely a new twist on an old standby.


Indian Spiced Roasted Squash Soup

1 yellow onion, chopped
8 ounces of carrots, chopped
4 garlic cloves, peeled
1 medium butternut squash, peeled and cut into 1" cubes
1 medium acorn squash, quartered
1 Tablespoon of olive oil
dash of black pepper

32 ounces of vegetable broth
1 teaspoon of curry powder
1/2 teaspoon of garam masala
dash of cayenne pepper
1/2 teaspoon of Kosher salt

6 Tablespoons of plain Greek yogurt
4 Tablespoons of honey

Directions: Preheat oven to 450. Place the onion, carrots, garlic cloves, butternut squash, and acorn squash on an olive oil-greased jelly-roll pan. Drizzle with olive oil, sprinkle with pepper, and toss to coat. Roast for 30 minutes, or until vegetables are tender.

Put the vegetable mixture into a large stock pot on the stove.  Add the vegetable broth, curry powder, garam masala, cayenne pepper, and salt. Using an immersion blender, puree until smooth. Bring soup to a boil, then reduce and allow to simmer for about 20 minutes.

Combine the Greek yogurt and honey, and stir until smooth. Drizzle over soup and serve. Enjoy!

Adapted from Cooking Light, original recipe here.

Saturday, October 29, 2011

Moroccan-Style Stuffed Acorn Squash

H and I have been eating a lot of acorn squash lately. We've received a lot of them from the CSA, and they have been tempting me in grocery store as well. I usually roast them with a bit of butter, salt, pepper, nutmeg, and brown sugar- which are delicious, but are getting a bit boring! So when I saw this recipe for a Moroccan-style stuffed acorn squash, it immediately went on the menu. It definitely sounded like a different and delicious thing to do with acorn squash!

We only used one acorn squash, rather than the two the recipe called for, so it definitely made more stuffing than needed, but it was great leftovers for lunch the next day. It is tasty, filling, healthy and easy to make. What else could you ask for?


Moroccan-Style Stuffed Acorn Squash

2 acorn squashes, halved and seeded
2 Tablespoons of olive oil, divided
2 cloves garlic, minced
2 stalks celery, chopped
2 large carrots, chopped
1 (15 oz.) can (or about 2 cups) of garbanzo beans, drained
1/2 cup raisins
1 1/2 Tablespoons ground cumin
salt and pepper to taste
2 cups of vegetable broth
1 1/2 cups of uncooked couscous

Directions: Preheat oven to 375. Rub one Tablespoon of olive oil on insides of squash and season with salt and pepper. Place them on a baking sheet lined with aluminum foil, flesh side up. Roast for about 30 minutes, or until mostly soft.

When there is about 15 minutes left on the squash, heat the other Tablespoon of olive oil in a large skillet over medium heat. Stir in the garlic, celery, and carrots, and cook for about 5 minutes. Mix in the garbanzo beans, raisins, cumin, salt, and pepper, and continue to cook and stir until vegetables are tender. Pour the vegetable broth into the skillet, and mix in the couscous. Cover, and turn off the heat. 

Allow couscous to sit for about 5 minutes to absorb liquid. Remove cover, fluff with a fork, and stuff squash halves with the couscous. Place in the oven for about 10 minutes, to get a slight crisp on top. Enjoy!

Adapted from allrceipes.com, original recipe here.

Thursday, October 27, 2011

Sweet Potato and Black Bean Enchiladas

I came across this recipe when I was looking for something different to do with tortillas. I was hoping for a roasted vegetable enchilada, but was intrigued (and a bit skeptical!) by this one. The only way to find out for sure though, is to try it of course!

The flavor was complex and interesting: it had the sweet from the sweet potato, the savory from the tomatoes, and the spicy from the poblano. They all blended together really well and it was a tasty, filling, and very healthy meal!


Sweet Potato and Black Bean Enchiladas

2 large sweet potatoes
1 Tablespoon of olive oil
1 large garlic clove, minced
1 small poblano pepper, seeded and chopped
1 (14.5 oz.) can of black beans, drained and rinsed
1 (14.5 oz.) can of diced tomatoes, drained
1 Tablespoon of chili powder
Kosher salt and black pepper to taste
2 cups of salsa
8 large flour tortillas
1/2 of an onion, chopped
1/3 cup of cheddar cheese, shredded

Directions: Preheat oven to 425. Wrap the sweet potatoes in aluminum foil and roast for about an hour, or until soft when poked with a fork. Unwrap, cut in half, and set aside.

Turn oven down to 350. Heat the olive oil in a large skillet over medium. Add minced garlic and chopped poblano, stirring frequently until fragrant. Add black beans, tomatoes, chili powder, and salt and pepper to taste. Scoop out cooked sweet potatoes, add them to the skillet, and simmer mixture 5 minutes. Remove from heat.

Spread enough salsa on the bottom of a 9x13" pan to cover. Place tortilla on a flat surface, fill with sweet potato mixture, and roll tightly. Place the enchilada in the pan. Continue with each tortilla shell, until all are filled. If there is any filling left over, spoon it on top of the enchiladas, then top with remaining salsa and sprinkle with onion and shredded cheddar.

Bake until casserole is hot and bubbly, about 20 minutes. Enjoy!

Adapted from Care2/Greenliving, original recipe here.

Tuesday, September 13, 2011

Mediterranean Couscous Bake

I'm a huge proponent of meal planning. I think it saves time and money, and helps keep one organized. It also involves making lists, which is something I'm strangely addicted to. However, I usually meal plan on Saturday for the following week and we go grocery shopping on Sunday. Having our CSA pick-up on Mondays sort of throws me for a loop. Since I don't know what we are going to get ahead of time, I am sometimes stuck trying to come up with a way to use something I totally wasn't expecting. And that is exactly how this dinner came about.

I have to admit that I'm particularly proud of this recipe. I wasn't going off of anything, just combining the vegetables that I needed to use up and keeping my fingers crossed. I was pleasantly surprised with the outcome. The vegetables have great flavor without much added to them, and it is great as leftovers as well. I might have to try this one again! 


Mediterranean Couscous Bake
(serves 6 as a side, 4 as a main course)

2 green peppers, sliced
1 medium eggplant, peeled and chopped
drizzle of olive oil
2 cloves of garlic, minced
2 large tomatoes, chopped
1 cup of dry couscous
1 Tablespoon of butter
pinch of salt
1 teaspoon of dry oregano
1/2 cup of feta cheese

Directions: Preheat oven to 350. Grease a 9 x 13 pan with a bit of olive oil.

Cook peppers and eggplant in a large pan with the olive oil and garlic until eggplant is cooked and peppers are soft. Put them in the greased pan, and add the chopped tomatoes. Stir to combine. Cook couscous according to package directions, with the butter and salt in the water. When couscous is done, add it to the pan. Add the oregano and feta, and stir to combine. Sprinkle a bit more feta on top, cover with aluminum foil, and bake for 20 minutes. Remove foil, and bake for 10 more. Enjoy!

Saturday, August 20, 2011

Gnocchi with Zucchini Ribbons and Cherry Tomatoes

This has to be one of the easiest dinners I've made in a long time. I did find it in a section of "Weeknight Meals Ready in Under 20 Minutes" so I guess I shouldn't be surprised, but I still wasn't quite expecting this easy. Not only was it an absolute cinch to put together, it was perfectly timed- the veggies cook in the same amount of time it takes to boil the water and cook the gnocchi. Just throw everything together at the end, and violà- dinner! It had me thinking "is that all I have to do?" which is definitely a good thing :)

It has a great, nutty flavor from the nutmeg and Parmesan, and feels like a great "transitioning into fall" dish. And while it's not exactly time to "transition into fall" quite yet, there's not nothing wrong with being prepared!


Gnocchi with Zucchini Ribbons and Cherry Tomatoes
(serves 4)

1 lb of fresh or frozen gnocchi (I used whole wheat)
2 Tablespoons of butter
1 shallot, chopped
1 large zucchini, very thinly sliced (I used a golden zucchini)
1 pint of cherry tomatoes, halved
1/2 teaspoon of Kosher salt
1/4 teaspoon of grated nutmeg
Freshly ground pepper, to taste
1/2 cup grated Parmesan cheese
1 handful of chopped fresh parsley

Directions: Slice the zucchini thin (with a mandoline slicer if you have one), chop the shallots, halve the tomatoes, and chop the parsley. Set each aside separately.

Bring a large pot of water to a boil. When it's boiling, add gnocchi. Cook until they float, for about 3-5 minutes.

Meanwhile, while you're waiting for the water to boil, melt the butter in a large saucepan over medium high. When it's melted, add the shallots and zucchini. Cook for about 5 minutes, until shallots and zucchini start to soften. Add the halved tomatoes, Kosher salt, pepper, and nutmeg, stirring occasionally. When gnocchi is done, drain it and add to the veggies. Stir to combine, and mix in the parsley and Parmesan. Enjoy!

Adapted from eatingwell.com, original recipe here.

Saturday, August 6, 2011

Summer Panzanella

I really don't know why it took me so long to try this recipe. I had bookmarked it last summer, but it fell through the cracks. Since the tomatoes are starting to get ripe now, I figured it would be a perfect time to finally make this dish. After all, fresh veggies and carbs are two of my favorite things :)

It was very easy and filling, and the flavors were just incredible! The vegetables and the bread really soak the flavor up. It is a great side for a picnic, or as a light week-day meal. Just make sure to keep the croutons separate from the salad until you serve it. Otherwise, they'll get soggy!


Summer Panzanella
(serves 4 as a main course, 6-8 as a side)

For the dressing:
3 Tablespoons of capers
4 Tablespoons of olive oil
3 Tablespoons of apple cider vinegar
3 garlic cloves, minced
1 teaspoon of Dijon mustard
1/2 teaspoon of Kosher salt
1/4 teaspoon of black pepper

For the salad:
3 bell peppers of different colors, sliced
1 medium red onion, sliced

2 large ripe tomatoes, cut into 1" chunks
1 large cucumber, peeled and sliced
20 leaves of basil, sliced

1 Tablespoon of olive oil
10 medium slices of Italian bread

Directions: Combine 1 Tablespoon of the olive oil for the dressing with the capers in a food processor. Pulse until they are a paste-like texture, and scoop into a bowl or dressing bottle. Add the other 3 Tablespoons of olive oil and the rest of the ingredients for the dressing and set aside. 

Place the chopped tomatoes and cucumber in a large bowl. Heat a little olive oil in a large saucepan, and add the pepper and onion slices. Sauté until they start to get a little soft, and then add them to the bowl with the cucumbers and tomatoes. Top with the torn basil. Pour the dressing on the salad, and allow it to marinate for at least 30 minutes. (Don't refrigerate, keep it at room temperature)

Preheat oven to 300. Grease a baking ban with the olive oil, and place slices of Italian bread on the pan. Bake for 7 minutes, remove, flip slices over, and bake for another 5 minutes. Slice bread into croutons. Set aside.

When ready to serve salad, combine with croutons in individual servings. (If you mix all the croutons with the salad and then happen to have left overs, the croutons will get soggy.) Enjoy!


Adapted from Ina Garten for foodnetwork.com, original recipe here.

Monday, August 1, 2011

Tomato and Cheddar Pie with Herbed Mayonnaise

As soon as I saw this recipe in the August issue of Bon Appétit, I knew I had to make it. It had everything I love- a carbalicious crust, ripe summer tomatoes, and cheesy-oozy goodness. It turned out delicious, although it is pretty heavy and definitely an indulgent treat. The crust is very thick and rustic, and the herbed mayonnaise was so good I wanted to lick it up! I think there is a lot of potential for changing this recipe up too, with different kinds of cheeses and sauces.

The dough for the crust is very sticky and wet, but it turned out fine. And also be warned, it takes a bit of time to put together, and then needs to sit at least an hour after baking and before serving. So skip this one if you're in a hurry, the waiting was tortuous!


Tomato and Cheddar Pie with Herbed Mayonnaise
(serves 4)

For the crust:
2 cups of all purpose flour
1 1/2 teaspoons of baking powder
1/2 teaspoon of baking soda
1/2 teaspoon of Kosher salt
6 Tablespoons of butter, cut into 1/4" cubes
3/4 cup of buttermilk

For the mayonnaise:
1/2 cup of mayonnaise
1 scallion, sliced thin
2 Tablespoons of chopped fresh dill
1 Tablespoon of apple cider vinegar
2 teaspoons of white sugar
1/2 teaspoon of Kosher salt
dash of black pepper

For the pie:
3 large ripe tomatoes, sliced into 1/4" slices
6 oz. of cheddar cheese, shredded
1 oz. of Parmesan cheese, shredded
1 1/2 Tablespoons of cornmeal
1 Tablespoon of olive oil for greasing and brushing

Directions: Whisk flour, baking powder, baking soda, and salt together in a small bowl. Add butter cubes, and mix by hand until mixture resembles coarse sand and some small lumps remain. Add in buttermilk, mix until just combined and form dough into a ball. Wrap tightly in plastic wrap, and refrigerate for at least 1 hour.

Place sliced tomatoes on a baking sheet lined with 2 layers of paper towels. Cover with 2 more layers of paper towels, and lightly press down. Allow to sit for 30 minutes, to draw out the moisture.

Place all the ingredients for the mayonnaise in a small bowl, mix well, and set aside. Mix the cheddar and Parmesan cheeses in a separate bowl, and set aside as well.

Preheat oven to 425. Grease a 9" glass pie pan with half of the olive oil, and place the refrigerated dough in the pan. Press down on the middle of the dough, pushing it towards and up the edges. Sprinkle the cornmeal on the bottom of the crust. Top with about 1/4 of the cheese mixture, then place tomatoes overlapping in a circular pattern (pressing down slightly to push out the crust) on top of the cheese, and then spread 1/3 of the herbed mayonnaise on top of the tomatoes. Continue to layer cheese, tomatoes, and mayonnaise, ending with cheese, until all ingredients are finished.

Brush crust with rest of olive oil, and bake in preheated oven for 35 minutes, or until crust is golden brown and cheese is melted. Allow to sit for at least 1 hour before serving. Enjoy!

Adapted from Bon Appétit, original recipe here.

Sunday, July 24, 2011

Sweet and Spicy Chinese-Style Eggplant

One of my co-workers has a very plentiful garden. Our office is extremely lucky, in that she often brings the bounty in to share with the rest of us. She brings in eggplants, all sorts of peppers, heirloom tomatoes, grape tomatoes, and zucchinis. This past week, there was a large basket full of eggplant that I could not pass up. I definitely took a couple home with me.

We've had a number of Italian inspired eggplant recipes lately, so I wanted to do something a little bit different. This recipe definitely jumped out at me, and I was curious to try it. It's actually meant to be made with Chinese eggplant, but it still tasted delicious with just regular eggplant. I loved the sweet and spicy combination of flavors, and was a cinch to throw together!


Sweet and Spicy Chinese-Style Eggplant

1 medium eggplant, peeled and cut into chunks (or 2 long Chinese eggplants)
1 teaspoon of salt

3 Tablespoons of soy sauce
2 Tablespoons of rice wine vinegar
2 Tablespoons of white sugar
2 teaspoons of corn starch
dash of red pepper flakes

1 Tablespoon of sesame oil

Directions: Place eggplant cubes in a large bowl, and sprinkle with the salt. Fill bowl with just enough water to cover the eggplant, and set aside for 30 minutes.

Meanwhile, whisk together soy sauce, rice wine vinegar, sugar, corn starch, and red pepper flakes.

Drain water from bowl with eggplant, and pat eggplant dry with paper towels. Heat the sesame oil in a large non-stick skillet or wok. Add eggplant, and cook over medium stirring occasionally until eggplant is mostly brown. Add sauce, stir to coat, and cook for another couple minutes. Serve immediately. Enjoy!

Adapted from allrecipes.com, original recipe here.

Friday, July 15, 2011

Watermelon and Feta Salad with Roasted Green Beans

Some summer nights, I really just want a salad for dinner. They're light, cool, refreshing, and (usually) you don't even have to turn the oven on. This recipe doesn't meet ALL of that criteria since you do have to roast the beans, but it is still a wonderful and easy summer recipe. And bonus- the roasted green bean recipe within the salad recipe are my absolutely favorite way to eat green beans as it is, and a great side dish for anytime of year.

I love the sweet and salty combination of the watermelon and feta, and the green beans give it a nice sensory kick.


Watermelon and Feta Salad with Roasted Green Beans
(serves 2)

for the salad:
1/2 pound of raw green beans, washed and trimmed
1 Tablespoon of olive oil
1 teaspoon of Kosher salt
1/2 teaspoon of black pepper

4 cups of baby spinach
1/8th of a seedless watermelon, cut into small cubes
1/2 cup of crumbled feta cheese

for the dressing:
1 lime, juiced
2 Tablespoons of olive oil
1 Tablespoon of chopped, fresh basil
1/4 teaspoon of Kosher salt
dash of black pepper

Directions: Preheat oven to 375. Grease a metal baking sheet with 1 Tablespoon of olive oil. Place beans on the baking sheet, and toss with a spatula to coat with the oil. Sprinkle the Kosher salt and black pepper on the beans, and cover the baking sheet with foil. Place in the oven for 10 minutes, remove foil, and return to oven for 8-10 minutes more.

Meanwhile, combine all ingredients for the dressing in a bottle, and shake well. Place spinach on plates, and when green beans are done, place them on the spinach. Top with the watermelon and feta, and drizzle on the dressing. Enjoy!


Adapted from Ina Garten, for foodnetwork.com, original recipe here.

Tuesday, June 28, 2011

Romaine and Purslane Salad with Tomatoes

I was searching for a different way to prepare the purslane that we had in our produce basket this week. I knew I wanted to saute it, to see what kind of flavor that gave it. When I found the recipe for this salad and saw that it also used zucchini, I knew it was going on the list to make!  

I loved the flavor in this salad, and the combination of the warm vegetables over the cold lettuce! It was very filling, and would even be perfect for a light, summer meal.


Spinach and Purslane Salad with Tomatoes and Zucchini

1/2 of a medium white onion, diced finely
2 cloves of garlic, minced
1/3 cup of olive oil, plus extra for greasing pan
3 Tablespoons of lemon juice

1 teaspoon of Dijon mustard
1 teaspoon of parsely
pinch of salt and black pepper

1 large zucchini, sliced
6 plum tomatoes, chopped
1 bunch of purslane, washed and thick stems removed
1 large head of romaine, washed and chopped

Directions: Pour a little bit of the olive oil into a saucepan, and heat to medium. Saute onions until mostly soft, stirring occasionally. Add garlic, and saute for about another 1 minute. Remove from heat.

Combine lemon juice, Dijon mustard, olive oil, salt, pepper, and parsley in a salad dressing bottle. Shake well to combine. Add onions and garlic from pan, and shake again.

Heat a bit more olive oil in the pan, add zucchini, cover, and cook until soft and slightly browned (about 5-7 minutes) and when it's done, place it in a large bowl.

Add purslane and chopped tomatoes to the pan vacated by the zucchini, and saute for about 1-2 minutes, or until purslane is slightly wilted. Then add to the bowl with the zucchini and stir to combine. Spoon tomato/zucchini/purslane mixture on top of romaine, and drizzle with the lemon Dijon dressing. Serve immediately. Enjoy!

Adapted from Epicurious.com, original recipe here.

Thursday, June 23, 2011

Kale and Kidney Bean Enchiladas

Since we had been getting a lot of kale in our produce baskets recently, I have been on the lookout for new and interesting ways to use it. This recipe definitely had what I was looking for! I loved the flavors in here, and was actually a little surprised at just how perfectly everything went together. It ended up being a hearty and filling meal- the kale flavor was almost subtle and it is definitely a different way to use such a bountiful ingredient this time of year!


Kale and Kidney Bean Enchiladas

1 large bunch of kale, washed and chopped (I used dinosaur kale)
1/2 Tablespoon of olive oil
1 onion, sliced thin
4 cloves of garlic, minced
1 3/4 cups of kidney beans (equal to one 15.5 oz. can)
1 Tablespoon of hot sauce
1 teaspoon of cumin
dash of salt
12 oz. of enchilada sauce
8 whole wheat tortillas at room temperature
4 oz. cheddar cheese, shredded

Directions: Preheat oven to 350. Heat the olive oil in a large skillet. Add onions and saute until soft, about 5 minutes. Add garlic, cumin, and salt. Cook for another 2 minutes. Add the kale in handfuls, and stir occasionally as it wilts. Add kidney beans, hot sauce, and 2 Tablespoons of the enchilada sauce. Mix until everything is coated and remove from heat.

Pour enough enchilada sauce in an oven-safe 9 x 13 dish to just cover the bottom. Add filling to the tortillas and wrap tightly. Place seam down in the pan, and repeat until they're all filled. Top with remaining enchilada sauce cheddar cheese. Bake for 30 minutes. Enjoy!

Adapted from Branny Boils Over, original recipe here.

Thursday, June 9, 2011

Tomato and Cucumber Salad

It's that time of year again, time to get out of the kitchen and outside grilling! I am always looking for new, lighter sides to bring to a big barbeque or just to make with an easy weeknight meal.

This one tastes great, is very healthy, and so easy to prepare. I can see us having it many times this summer, especially after tomato season is in full swing!


Tomato and Cucumber Salad
(serves 8)

10 italian tomatoes, quartered
2 cucumbers- skins left on, sliced thinly
1 medium red onion, sliced thinly

2 Tablespoons of olive oil
2 Tablespoons of red wine vinegar
1/2 teaspoon of Kosher salt
dash of fresh ground pepper

Directions: Mix cut veggies together in a large bowl. In a separate small bowl, prepare the dressing (olive oil, red wine vinegar, salt, and pepper). Drizzle dressing over vegetables, and stir to combine. Refrigerate for at least 30 minutes before serving cold. Enjoy!

Adapted from Rachael Ray for foodnetwork.com, original recipe here.

Saturday, March 5, 2011

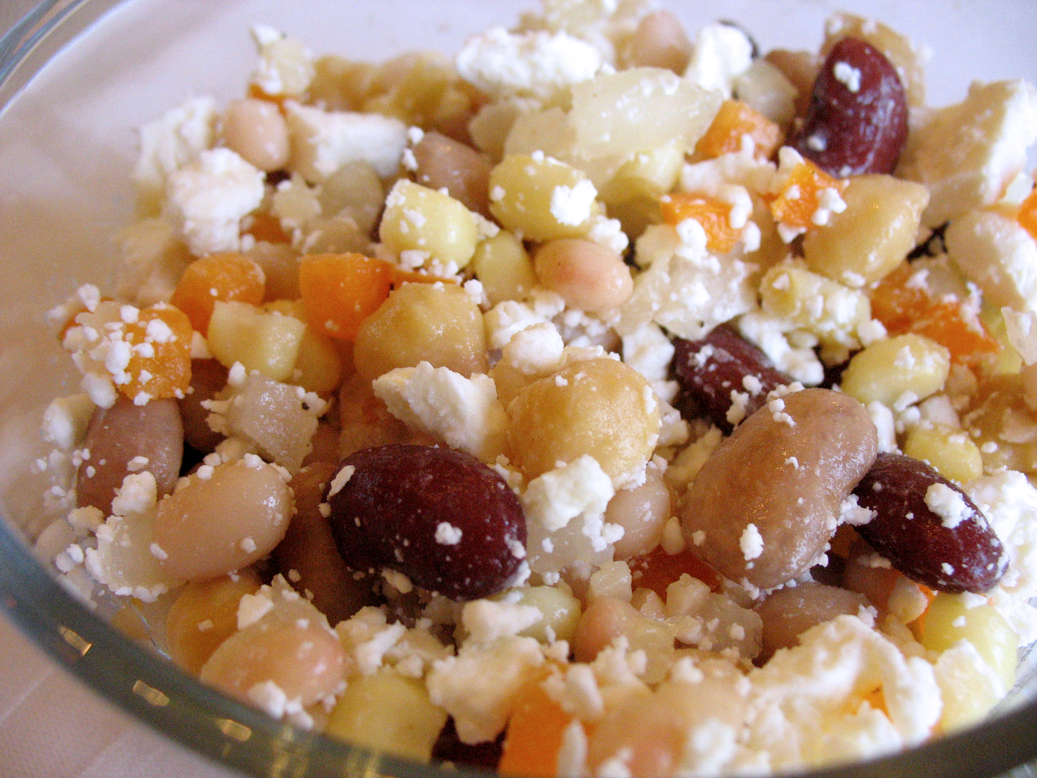
Five Bean Salad

I've been feeling a bit groggy in the afternoons recently.

My go-to fix is a second (or third) cup of coffee, which I know isn't the greatest choice. It rarely gets me out of my fog and more often than not, it just gives me a bad case of jitters. I did a bit of research (aka Googling), and it finally dawned on me that the high number of carbs in the sandwich and fruit that I usually eat for lunch may be contributing to that sleepiness later. Maybe steering more towards a high-protein lunch could be the solution I need.

So I started looking for lunch ideas of the high-protein variety, and found this one. I love that it's so versatile. You can certainly switch up the varieties of bean you use, or skip any if you don't like them. Definitely tasty, and definitely healthy!


Five Bean Salad

2 cups of black beans
2 cups of pinto beans
2 cups of navy beans
2 cups of garbanzo beans (chickpeas)
2 cups of kidney beans

1 package of frozen white corn
1 red bell pepper, chopped
1 green bell pepper, chopped
1 medium white onion, chopped
1 Tablespoon of minced garlic

3 Tablespoons of olive oil
3 Tablespoons of red wine vinegar (I ended up using a bit more)

salt and ground pepper to taste

Directions: Cook frozen corn, and then mix all of the beans and vegetables. Drizzle with olive oil and vinegar topping, salt and pepper to taste, and stir to combine. Enjoy!

(This is a great base recipe, and I've been adding lots of different things for more flavor- I've tried feta cheese, cilantro, cooked shredded chicken breast, and a can of tuna. All of those mix-ins have turned out well. I also love the extra boost of protein some meat or cheese brings in.) 

Adapted from SparkPeople, original recipe here.

Wednesday, January 12, 2011

Cranberry Leek Quinoa

I recently bought a big bag of quinoa on a whim. It's a fairly new ingredient to me, so I am constantly looking for interesting ways to use it. I am quickly falling in love though, quinoa is so healthy, delicious, and versatile!

With the chicken stock, sage, and cranberries, this recipe kind of has the flavors of stuffing, which I LOVE! This would be great with chicken breast mixed in, as the original recipe directs, or as a side for a chicken main course.


Cranberry Leek Quinoa

Serves 4

1 1/2 cups of chicken stock (or vegetable stock)
3/4 cup quinoa, rinsed and uncooked
1/3 cup of dried cranberries

1 Tablespoon of olive oil
1 leek, sliced
1 teaspoon of dried sage
1/4 cup of dry white wine

Directions: Heat chicken stock to a simmer in large saucepan. Add quinoa, cover, reduce heat to medium-low, and cook for 15 minutes. When quinoa is done, remove from pan into a large bowl, and mix in dried cranberries.

Pour the olive oil in the saucepan, and add the leek and sage. Cook until the leek is wilted, about 5-8 minutes. Pour in the white wine, and allow to burn for about 30 seconds. Add the quinoa/cranberries back in, and allow to cook uncovered for about 3 minutes, stirring occasionally. Serve immediately. Enjoy!

Adapted (loosely) from Cooking Light, original recipe here.

Thursday, December 9, 2010

Spinach and Artichoke Dip Pizza

Spinach and artichoke dip is one of my favorite savory treats. I've never actually made it at home, but there are few things I enjoy more than a bubbly, cheesy, creamy spinach and artichoke dip at a restaurant with nice, thick, pita slices to scoop it up. So when I found this recipe for spinach and artichoke pizza that would let me turn one of my favorite indulgences into something that is considered an acceptable meal, I was sold. How could I not be?

I added sun-dried tomatoes and chopped onions, since I had them on hand and thought they would be an interesting addition. You may feel those additions are blasphemy to the very idea of spinach and artichoke dip, so you can feel free to leave them out. 


Spinach and Artichoke Dip Pizza
(serves 4)

2 Tablespoons of butter
2 garlic cloves, pressed
1/4 teaspoon of red pepper flakes

2 Tablespoons of flour
1 1/2 cups of milk (I used skim, and it worked fine)
1/2 teaspoon of salt
1/2 cup of fresh grated Parmesan cheese (split into two 1/4 cup portions)

1 Tablespoon of olive oil
1 onion, chopped
8 sun-dried tomatoes, sliced
10 oz. of fresh spinach, washed and chopped

1 10-12oz. jar of artichoke hearts, artichokes halved
8 oz. shredded mozzarella cheese

1 pizza dough (thawed if it was frozen)
2 Tablespoons of cornmeal

Directions: Preheat oven to temperature your pizza dough recommends. When oven is hot, insert pizza stone (or baking pan if you don't have one) to heat it up.

Melt butter in a large saucepan, add red pepper flakes and garlic, and saute over medium heat for about 1 minute. Whisk in flour, and stir until combined and smooth. Slowly whisk in milk, continuing to stir. Allow to simmer lightly and thicken for about 5 minutes, stirring occasionally. Remove from heat after 5 minutes, and stir in first 1/4 cup of the Parmesan cheese and the salt.

Meanwhile, heat olive oil in a large pan, and add onions and sun-dried tomatoes. Cook for about 5 minutes, or until onions are soft. Add spinach, and cook until just wilted. When done, press as much liquid out of the spinach as possible. Add to the white sauce, and stir to combine.

Remove the pizza stone from the oven and sprinkle with the cornmeal. Roll out dough and place on the pizza stone. Spread spinach mixture all over the top. Place artichoke halves all around, and then cover it all with mozzarella cheese. Top with remaining 1/4 cup of Parmesan cheese, and bake for the time your pizza dough recommends. Enjoy!

(Note: I put that this makes 4 servings, as it did for a main course. If you're using it as more of a side, it can probably serve 6. Servings also depend on your pizza crust as well.)

Adapted from The Way the Cookie Crumbles, original recipe here.

Tuesday, November 16, 2010

Cinnamon, Pumpkin, and Squash Pot Pies

When I first saw this recipe, I just knew I had to try it! It absolutely spoke to me, but for a reason I could not put my finger on. It did have pumpkin of course, which I am definitely a fan of, but as far as the ingredient list as a whole, I was skeptical, quite honestly. Maybe I was just feeling curious and adventurous, but I finally bit the bullet and made it. I really had no idea what to expect, but I was blown away! This one is a winner!

It was a bit time consuming, but well worth the effort. It can be prepared in advance and refrigerated until you're ready to bake it, so it would be a great way to wow your guests at a dinner party!

This recipe made enough to fill 8 6-ounce ramekins. I definitely think it would be better in slightly larger ones, maybe 4 10-ounce ones instead. Also, I'll say it served 4 to be safe- I was OK with one of these (in addition to a salad and roasted squash) for dinner, but H needed two to feel full.


Cinnamon, Pumpkin, and Squash Pot Pies
(serves 4)

3 medium sweet potatoes

2 cups of pumpkin puree
1 Tablespoon of chopped, fresh rosemary
1/2  teaspoon of salt
black pepper to taste

1 Tablespoon of olive oil
2 cloves of garlic, minced or pressed
1 leek, chopped

1/2 cup of heavy cream (I used half and half)
1 Tablespoon of cinnamon

2 Tablespoons of olive oil
1 onion, chopped
1/2 of a butternut squash, peeled and diced

1/2 cup of heavy cream (I used half and half)
1/2 cup of golden raisins
1 handful of cherry tomatoes, halved

2 scallions, chopped
6 basil leaves, chopped

3 oz. of herbed Brie, sliced thin
3 oz. of mozzarella, shredded
3 oz. of Cheddar, shredded

1 pie crust (I used this recipe), cut out into circles just slightly larger than your ramekins
1 egg white

Directions: Heat oven to 425. Wash and wrap sweet potatoes in foil, and cook for about 45-60 minutes, depending on size.

When potatoes have about 20 minutes left, mix pumpkin puree, rosemary, salt, and pepper in a bowl to combine. Spread mixture on an aluminum-covered baking sheet. Roast for about 15 minutes (still at 425, so you can do this while the potatoes are still in there).

Meanwhile, heat olive oil in a saucepan, and add leek and garlic. Saute until soft, about 8-10 minutes. Add in heavy cream and cinnamon, and cook over medium for 5 minutes. Add pumpkin mixture, and stir to combine.

Spray the bottoms of your ramekins, and divide pumpkin mixture evenly between them. Set aside. (When sweet potatoes are done in the oven, probably around this stage, remove, unwrap, peel, chop them, and set aside. Turn oven down to 350.)

Heat olive oil in a saucepan, and add onions and butternut squash. Cook for about 5 minutes. Add heavy cream and raisins, and let cook over medium heat until squash is cooked through- about 10 minutes. Add in scallions, basil, tomatoes, and sweet potatoes, and mix lightly to combine.

Remove from heat, and stir in mozzarella, Cheddar, and Brie until fully melted. Divide squash mixture evenly between ramekins, on top of the pumpkin.

Top each ramekin with a pie crust circle. (If you are preparing these ahead of time, now is the time to cover in plastic wrap and refrigerate until ready to bake.) Brush each top with an egg wash, and bake for about 25-30 minutes at 350, or until top is golden brown. Enjoy!

Adapted from The Novice Chef, original recipe here, originally from RecipeLink.

Monday, November 1, 2010

Roasted Balsamic Vegetables

This side dish is one that is very healthy and extremely versatile. I often serve it with light, Italian dishes. You can pretty much use any veggies (or herbs!) that you wish, or whatever you have on hand. I've used parsnips, red onion, other types of peppers and squash, even green beans in it, and it's always turned out well. Just make sure to put any harder, takes-longer-to-cook vegetable in with the first batch and others with the second (you'll see what I mean when you read the recipe!). The sweet potatoes seem like a strange addition, but I really like the flavor they give it. There's always something about that sweet/salty combo...
 

Roasted Balsamic Vegetables
Serves 4

1 Tablespoon of olive oil, plus more for drizzling

2 large sweet potatoes, peeled and chopped
2 or 3 handfuls of baby carrots
2 red peppers, chopped
1 bunch of asparagus, chopped
1 large zucchini, sliced
2 portobello mushroom heads, sliced

1/4 cup of balsamic vinegar
4 cloves of garlic, minced
1 teaspoon of dried basil
black pepper

Directions: Preheat oven to 400. Grease bottom of 9X13 glass pan with 1 Tablespoon of olive oil. Put sweet potatoes and carrots in the pan, and roast for 30 minutes. Remove from oven, and put peppers, mushrooms, asparagus, and zucchini in the pan and drizzle with olive oil. Return pan to the oven, and roast for 30 minutes more.

When vegetables are done, remove from oven and use a spatula to mix. Let cool slightly. In a large ziploc bag, mix balsamic vinegar, basil, garlic, and pepper. Place vegetables in, and shake to coat. Remove from bag, and place in serving bowl. They can be served warm, or room temperature. Enjoy!

I have been using this recipe for quite a long time, and am not sure where it originally came from. I tried to Google it, to see if I could find the source, but with no avail. Please let me know if it is yours, or you know where it came from!

Tuesday, October 26, 2010

Butternut Squash Vegetable Soup

New Jersey has always gotten somewhat of a bad rap. TV shows like Jersey Shore and the Real Housewives of New Jersey certainly didn't help this, yet I can't blame it all on them. However, I love where I live. New Jersey has both beaches and ski resorts, forests, farms, and cities. We experience all four seasons, yet nothing too extreme. We're within a few hours drive from most major cities in the Northeast. And most importantly, New Jersey is the Garden State.

Laugh all you will, but until the other weekend I really had no idea how much produce came out of the Garden State. Obviously, I'm a huge fan of Jersey tomatoes in the summer, and I know there are a large number of blueberry and cranberry fields nearby too. But the farmers market H and I went to made me realize that those few things are far from all the area has to offer.

Now I've been to farmers markets before too, of course, but they've usually been small, mom-and-pop, side-of-the-road ones with just a few things to pick from. This one, however, was huge! Huge. I was surprised to see eggplants, pumpkins, pears, more types of squash, peppers, greens, and apples than I knew existed, all grown on the neighboring farms. And when I saw the you-pick schedule that included grapes, peaches, cherries, raspberries, and plums throughout the summer, I was blown away. Who knew? Clearly, not me.

I was definitely inspired, to say the least. All those fresh, cheap ingredients was like heaven for me. H had to stop me from going a bit crazy.

Two of the vegetables that I bought were kale and butternut squash. I've never cooked with either of these before, so needless to say I was excited. I did want to find a recipe that included both of them, and at times like that, I turn to allrecipes.com's ingredient search. There was only one recipe that included both of those ingredients (which made my decision easier) and it sounded good, so onto the menu it went.

It turned out really well! It was hearty, filling, and healthy, and the butternut squash gave it a great flavor. I got some crusty French bread to serve with it and absorb all that delicious broth.


Butternut Squash Vegetable Soup
(serves 8-10)

1/4 cup of olive oil

1 large onion, chopped
4 garlic cloves, minced

1 butternut squash, peeled and chopped
4 carrots, peeled and sliced
3 red potatoes, peeled and chopped

4 cups of chopped kale
12 cups of vegetable broth
1/2 teaspoon of thyme
1/2 teaspoon of salt
black pepper

Directions
: In a large stockpot, saute onion and garlic until onion is soft and translucent, about 15 minutes. Add carrots, butternut squash, and potatoes, and continue to cook for about 20 minutes. Add vegetable stock, kale, thyme, salt, and pepper, and bring to a boil. Let simmer for at least 45 minutes.

Take about 3 cups of the soup, and set aside. When slightly cooled, place into a blender. Puree until it reaches a thick liquid, return it to the stock pot, and stir. Serve with a crusty French bread, and enjoy!

Adapted from allrecipes.com, original recipe here.

Saturday, October 2, 2010

Pumpkin Lasagna

I have a confession to make.

I have somewhat of a hoarding problem. No, I'm not like the people you see on TV, who are buried in mountains upon mountains of stuff, their addiction alienating friends and family. My hoarding problem involves pumpkin puree. Lots and lots of pumpkin puree. Really. The proof is in the cupboard.

Come every fall, I get wind of some type of pumpkin shortage. Whether this shortage is real, simply a rumor, or caused by crazies such as myself (which I imagine must be the case at least sometimes), I buy a few cans to "stock up" every single time I go to the grocery store.

And no matter how many cans of pumpkin I accumulate, I am still extremely particular about the recipes in which I choose to use my precious stock. I actually have a couple rules regarding it. Rule number one: whatever I make, I don't share it. I usually love sharing the fruits of my baking labor with friends, family, and co-workers. It's better for my waist-line, gives me those "warm fuzzies," and let's face it, all the compliments and "mmmmm's" don't exactly hurt my ego. However, that's not the case with any pumpkin goodies. In the rare occasion that we have some left over after a day or two, they go in the freezer to be enjoyed by H and I at a later date. Selfish, selfish, I know.

Rule number two: I'm very unadventurous in my pumpkin recipes. I usually love trying new recipes and ingredients, but pumpkin recipes have to be for something that I'm absolutely certain that I'll enjoy. God forbid I use up a can of pumpkin puree in something that doesn't turn out well.

So there you have it. Call me crazy, blame me for the pumpkin shortage at your local grocery store, or what have you. But all this does have a point... Last week, I was gazing at all the drool-worthy food porn on foodgawker.com, and I stumbled upon this recipe for pumpkin lasagna. It looked... delicious. But I hesitated in saving it, as it didn't follow the rules. I've only had savory pumpkin dishes a handful of times, and only in restaurants. I've never actually attempted one. But something about it... just drew me in. I decided to bite the bullet and add it to this week's menu.

(Edited: With all the waxing poetic about my love of pumpkin, I completely forgot to mention how this turned out! It was good, and I was really glad to be able to step out of my comfort zone a bit! A piece of advice- don't skimp on the salt. I did, because I am trying to cut back on sodium and I don't really like things too salty, but the salt definitely brought out a good flavor.)


Pumpkin Lasagna

9 lasagna noodles, either the no-boil kind, or the regular ones prepared according to package directions and left submerged in cold water

16 oz. sliced mushrooms, chopped
1 large white onion, chopped
1 Tablespoon of olive oil

2 1/2 cups pumpkin puree
1 cup of half and half
1 1/2 teaspoons of dried sage
salt and pepper to taste

1 1/2 cups of ricotta cheese
1 egg

4 oz. of mozzarella cheese, shredded
1/4 cup of fresh grated Parmesan cheese

Directions:
Preheat oven to 375.

Saute mushrooms and onion in olive oil, with a dash of salt and pepper. Allow them to simmer until soft, and then drain of excess liquid. Meanwhile, combine pumpkin puree, half and half, sage, and another dash of salt and pepper into a large bowl. Into a third bowl, mix ricotta cheese and egg and beat until combined.

Lightly spray cooking spray on the bottom of a 9X13 baking pan. Start with the pumpkin mixture and spread about 1/2 cups worth on the bottom of the pan, enough to lightly cover. Layer pasta next, then ricotta cheese mixture, then a couple scoops of the mushrooms and onions. Top again with pumpkin, and continue to layer until you run out of ingredients. Sprinkle mozzarella and Parmesan cheese all over the top.

Cover with foil, then place in the oven and bake for about 40 minutes. Remove cover, and bake for 10-15 minutes more, until the cheese is starting to get golden brown. Remove from the oven and allow to sit for about 10 minutes. Enjoy!

Adapted from Prevention RD, original recipe here.

Thursday, September 30, 2010

Grilled Vegetable Sandwiches

One of our favorite vegetarian meals is this grilled vegetable sandwich. It's a fairly standard sandwich, but this particular version was inspired by a dish on the menu at a little Italian restaurant where I used to work. I enjoyed working the lunch shift solely because I got to eat one of these sandwiches. So one day, I decided to try to recreate this dish at home!

These are delicious and filling and oh-so-easy-to prepare. And vegetarian to boot!


Grilled Vegetable Sandwiches

6 hoagie rolls
1 Tablespoon of olive oil    
1 eggplant, chopped or sliced
2 red peppers, chopped
1 zucchini, chopped or sliced
1 10 oz. bag of baby spinach
3 portobello mushroom caps, chopped or sliced
6 slices of provolone cheese
1 cup marinara sauce

Directions: Preheat oven to 400. Heat olive oil in a large non-stick skillet. Sauté vegetables in skillet until mostly soft. (I usually do them one type at a time, and then set them aside- it's a lot!) Pile veggies into the rolls, and cover each with a slice of provolone cheese. Place on a foil-lined baking sheet and place in the oven until lightly toasted and cheese is melted. Use the marinara sauce for dipping. Enjoy!

Note- I have made these both by slicing up the veggies and layering them on the sandwich, and by  chopping them up small, and doing it almost sloppy joe style. Both ways are delicious!